Deep Tech: Pictures From an Inferno? Part 1
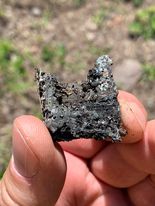
A wildfire is about the worst case scenario for camera trappers. In many parts of the US, fires are a real risk to camera sets. This was certainly the case in Oregon. In the summer of 2020, several major fires swept through hundreds of acres of forest in the American northwest. The heat from such intense fires is fatal to any unlucky trail cameras caught in the inferno. The extreme temperatures, and subsequent burning of flammable camera components leaves a barely recognizable carcass.
Not everything may be lost. The silicon “chip” inside the SD card may still contain retrievable data — a last message to the world.
In full disclosure, in this “Part 1” post, I don’t actually get to the point of recovering any photos. “Part 2” is by no means guaranteed. In fact, I’ve pretty much hit a roadblock. I’ll describe the nature of the roadblock at the end of this post. I’m hoping that someone out there in the internet has an idea, or some equipment that may help. I am definitely seeking help!
Anatomy of an SD card
The roughly inch square SD card used in most trail cameras is almost all packaging. The plastic case gives some physical heft to the tiny electronic parts. Otherwise it would be hard to hold, let alone find if you dropped on the ground. The active part is a tiny sliver of highly engineered silicon that stores information.
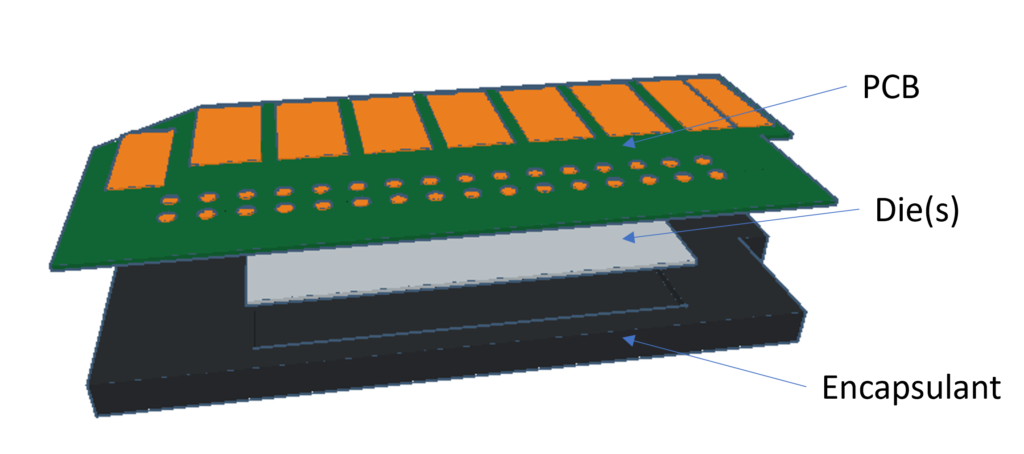
This sliver, (technically a silicon “die”) consists of an array of tiny 4-bit memory cells. Each cell has a volume of about 100 cubic nanometers. A nanometer is a billionth of a meter. Thi is a thousand times smaller again than the ~50 micrometer diameter of a human hair ).
How and SD Card Stores Information
Imagine that you have a silk handkerchief that you want to use to store 1 bit of data. You can store a “1” by putting it in the dryer, where it accumulated a static charge. Altnernatively, you can store a “0” by not putting it in the dryer (no charge). To read the stored value you touch it at some later time. If you get a light shock, the stored data was a “1”; if not, it is a “0.” This is the same principle at work inside a modern SD card. Of course, with orders of magnitude more complexity needed to get so many bits into so little a space and to read and write reliably.
The good thing for us is that electric charge storage is, in principle, relatively immune to temperature effects. As long as the structures in the chip stay intact. These structures, in turn, are heat tolerant because the chips need to survive the high temperatures during used during fabrication. We can also, take advantage of redundancy engineered into the SD card.
Retrieving the SD Card
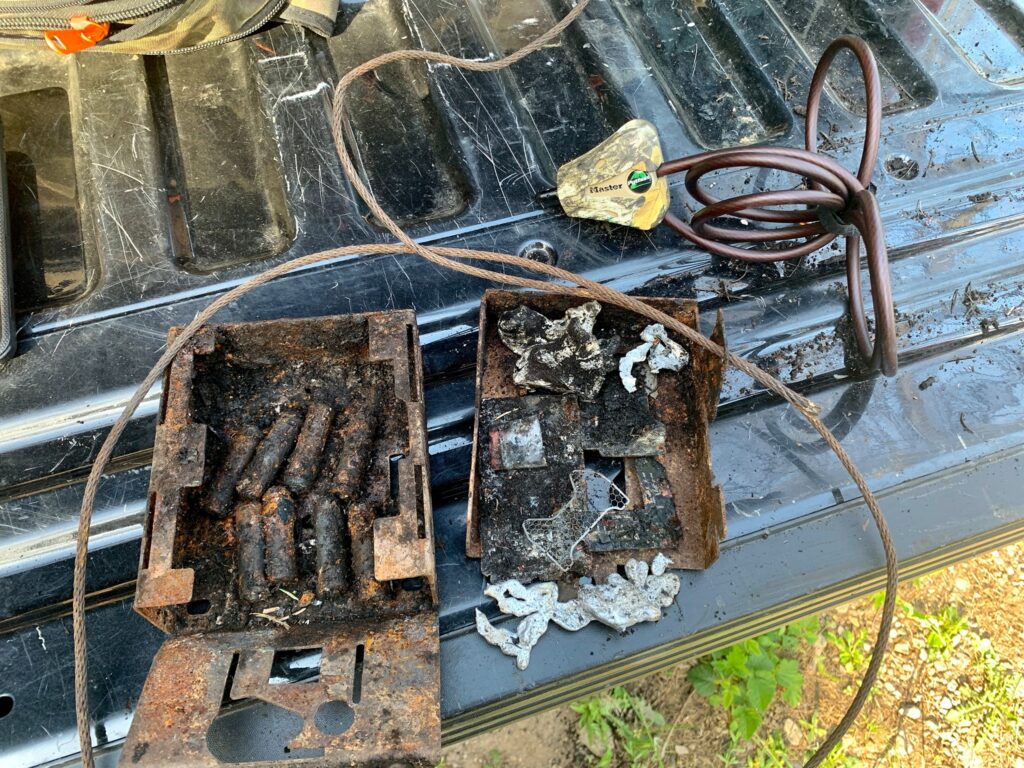
I am indebted to Steve Cole, who ventured into the burned area to retrieve the remains of his camera, and then returned to sift through the soil underneath these remains for the SD card. Photo below show what he found.
Retrieving the Die
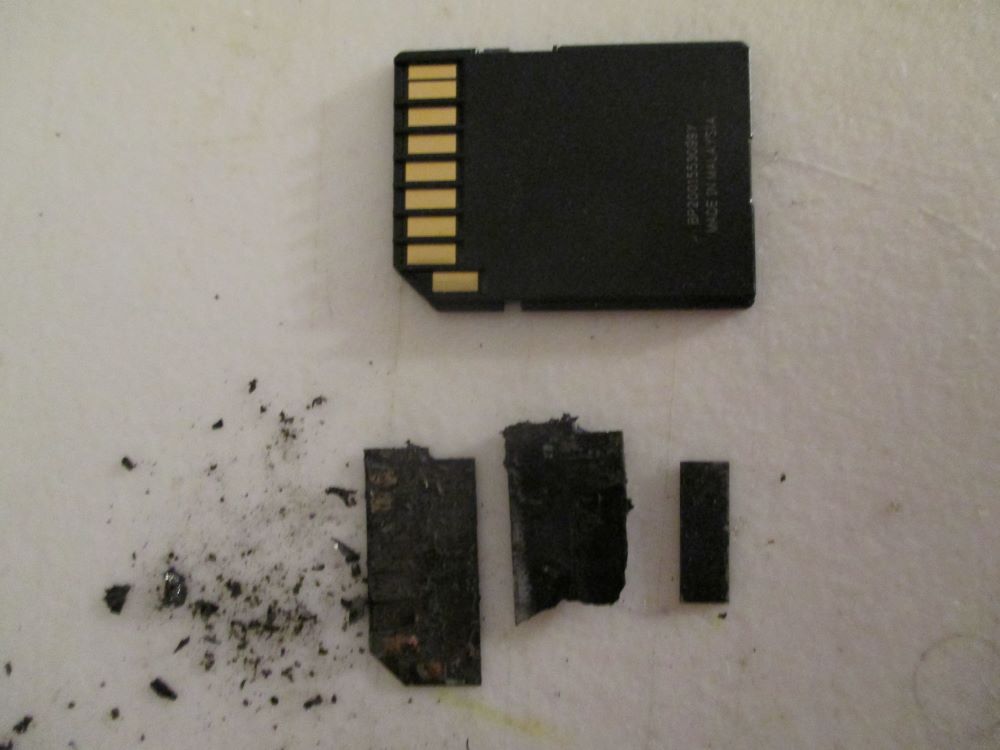
The SD card from the fire is recognizable, but obviously severely damaged. It cannot be simply “cleaned up” and put back in a reader
What kind of SD card Was it?
Unfortunately, Steve didn’t recall exactly what make or size SD card had been in the camera before it was immolated. Thus, the first step was to figure out the make and capacity of the SD card. With this information, I was able to examine an intact card of the same type to reverse engineer the die connectivity.
With an optical microscope, I was able to discern the following markings on the die I recovered:
TOSHIBA/SANDISK
FSTO 258G
An internet search of this character string leads me to conclude that the was a 64 GB SanDisk Ultra 1 SD card.
The SD Card Carrier
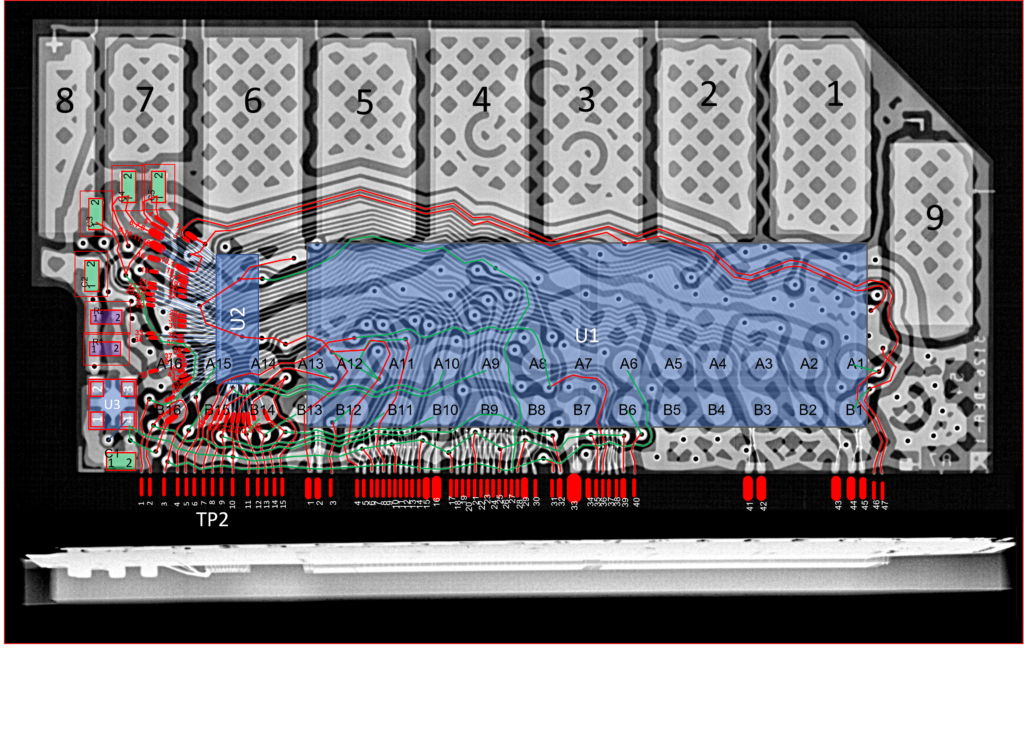
Inside the small SD card carrier is a small circuit board. The PCB, or package substrate, provides a physical place to mount the small and fragile silicon die. It also provides connectivity between the die and the 9 “fingers” or contacts we see on the SD card when we hold it. This carrier is about 10mm x 20 mm and contains hundreds of tiny copper traces in two layers. In addition to the 9 SD card pins, there is an array of 32 “test pads” which can be used to drive the the NAND Flash array directly, bypassing the SD card controller which is also built into the die. There are also a few small bypass capacitors which provide peak current for the bursty power requirements of the NAND Flash.
To recover the data, I will need to figure out how the die should be connected.
Unfortunately, the original substrate was too damaged in the fire to preserve all the information we need. Fortunately, with the make and model of the SD card, I can work with a new card of the same type. Now all I needed was to know what’s inside that.
X-ray, Please
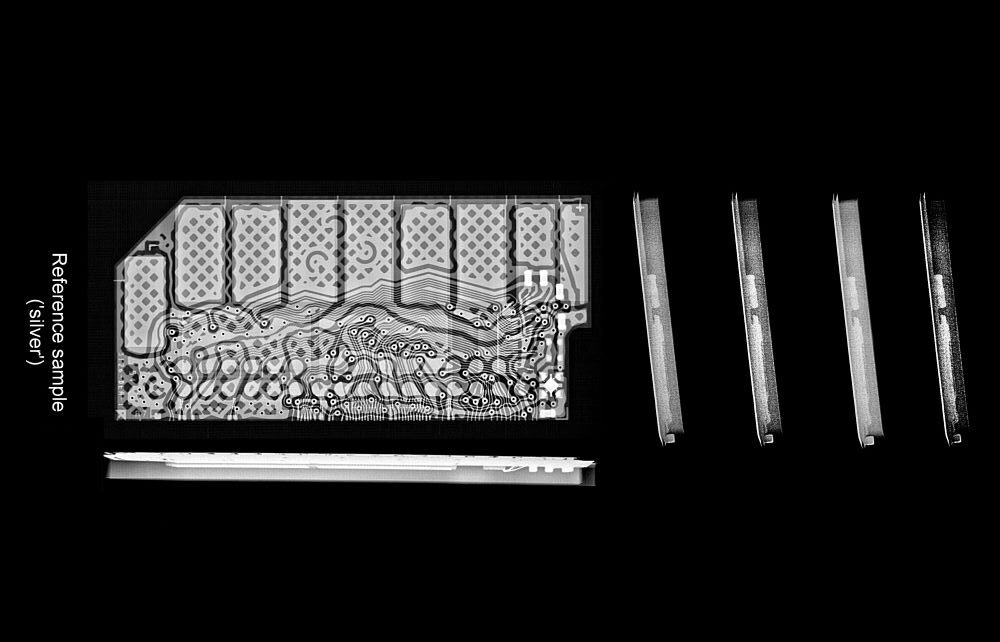
One approach would be to carefully “destroy” the working SD card in such a way to expose the traces on each of the substrate wiring layers. Instead, I was very fortunate to find a colleague online with a high resolution x-ray machine. I found some of his x-ray images of SD cards and they were exquisitely detailed. He graciously volunteered his machine and expertise and took x-rays of several new SD cards. He also x-rayed the remains of the substrate I recovered.
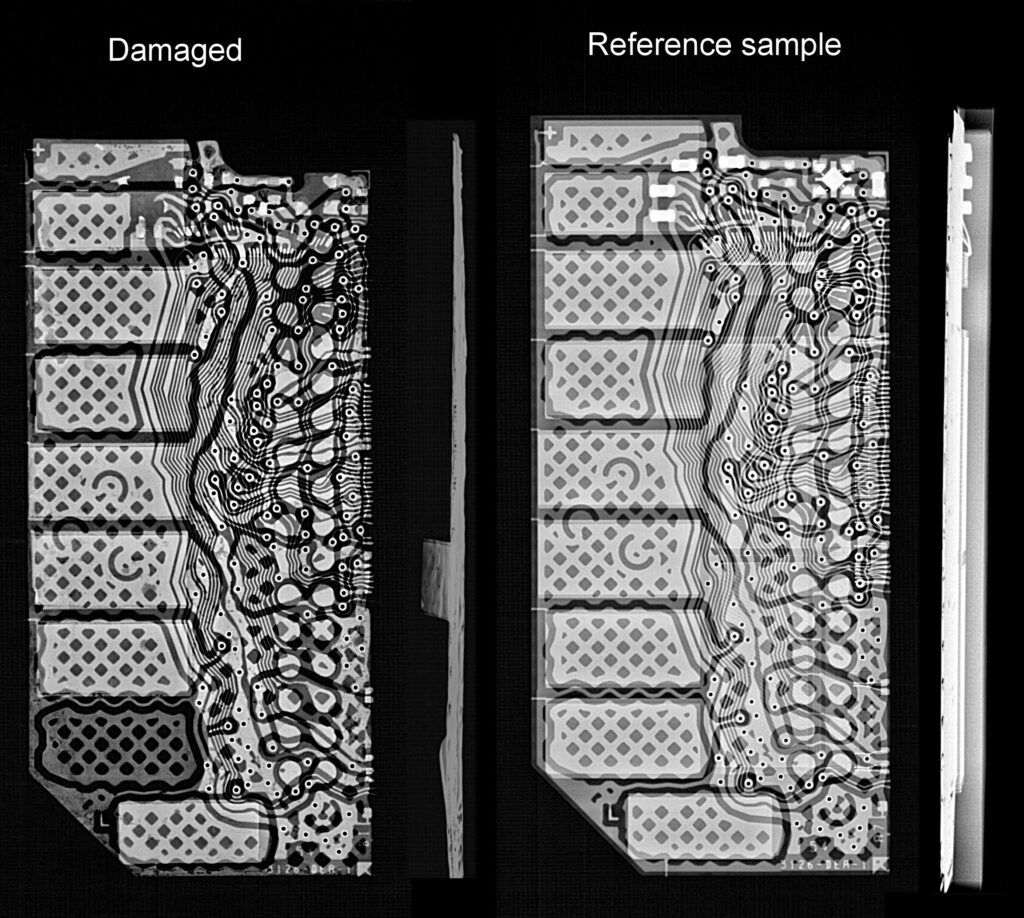
Note the excellent match in the highly detailed trace pattern. This photo not only shows that we’re on the right track, but gives us the information we need to reverse engineer the connectivity to the data die. It does point to a few challenges
What the X-Rays Show
These photos hint at the extensive engineering that goes into SD cards. They also hint at some challenges ahead
Die Stacking, Anyone?
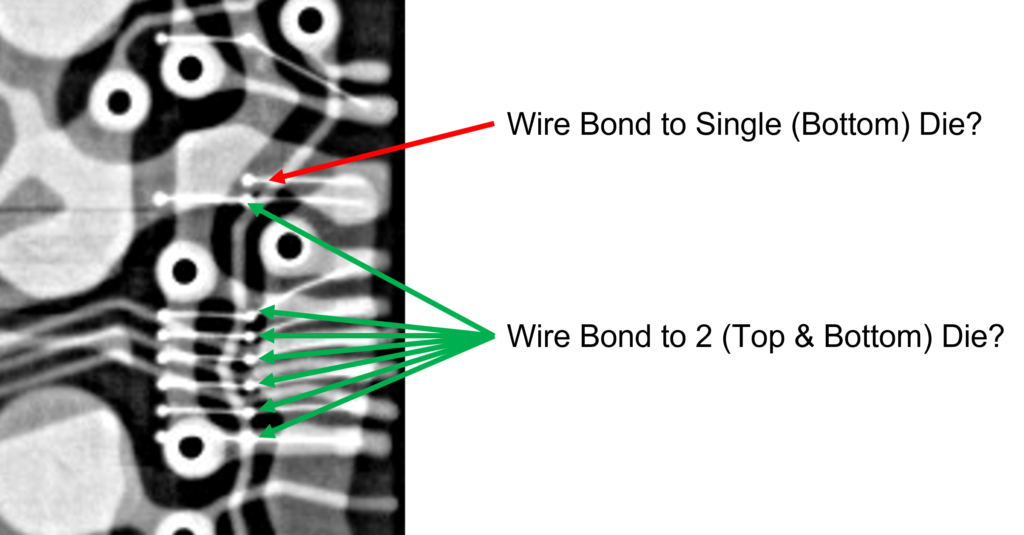
The high resolution x-ray image of a working 64 GByte SD card clearly shows a bonding pattern to two, stacked dies. If you look carefully, many of the small bonding wires have 3 “ball” connections — one to the PCB substrate, and two closely spaced connection to the die. This is strong evidence of an advanced packaging technique known as “die stacking”. In order to keep the package as small as possible, multiple dies are “stacked on top of each other”, exposing offset bonding pads on one side. See diagrams below
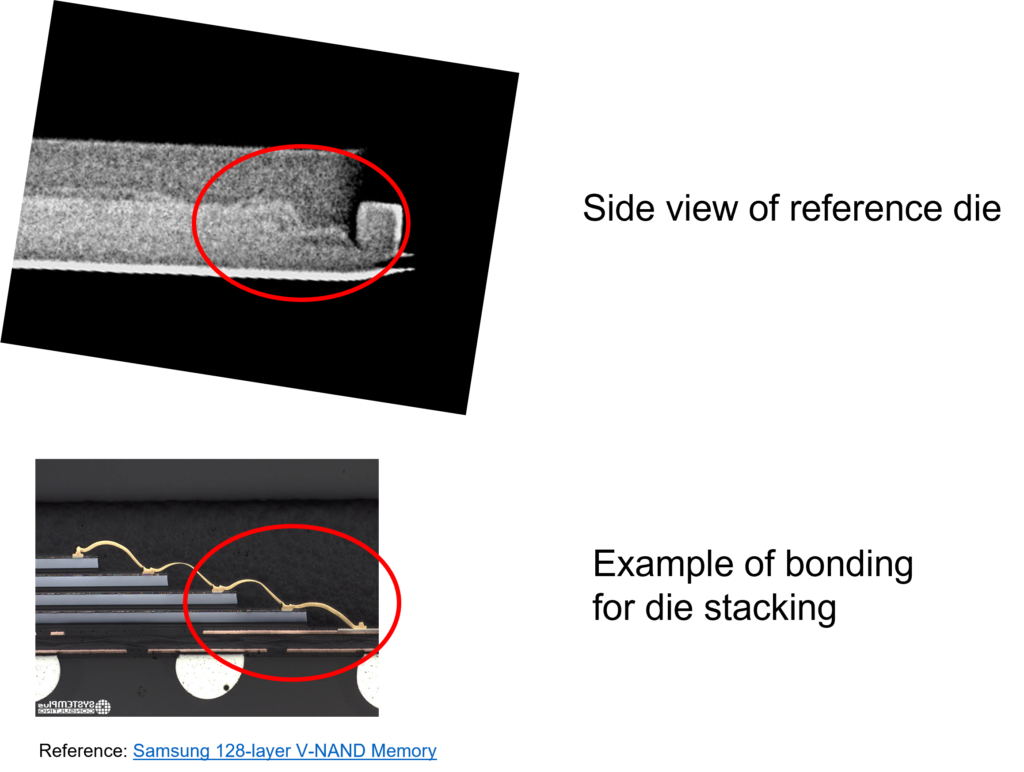
But I was only able to recover a single die from the powdered remains of the SD card from the fire. Unfortunately, data is typically “striped” across dies at a fine level (e.g. every other data word). Even if I could recover data from one die, I likely would only have half the data I needed to recreate any of the the photos or video on the die.
Missing Controller Die and Other Parts
in addition to the stacked data die, the x-ray photograph of the reference SD card clearly shows another small die in the package, most likely the controller used to turn the raw bits in the storage dies into something that’s SD-card compatible. I was not able to recover this die from the charred remains either.
In principle, I could use the controller die from a working SD card, but I would have to get it out without damaging it. I have also read on the internet that the controller die contains encryption keys needed to recover data NAND Flash die.
Stuck
So here’s where am:
- I think I could figure out the internal wiring pattern of the SD card carrier, and, eventually, the pinout for the NAND Flash die I have
- I think I could clean the die I have enough to allow wire bonding to pads on the die
- I think I could find someone to do the wire bonding
- I think that the I am missing the 2nd NAND Flash die in a two-die stack
- I think that I am missing the controller die that is translates from the SD card protocol to the protocol used to communicate with the NAND Flash die(s).
- I know of highly specialized tools that might be able to read data from the storage die directly and make sense of it. These include, for example, the formidable PC3000 Flash from AceLab.com. Unfortunately, these tools are expensive, running USD $5-10K. Perhaps more daunting is the expertise required to use these tools effectively.
If anyone out there can correct my list, or has access to and training on heavy duty SD card recovery tools, please let me know in the comments below. I would really love to get to “Part 2” of this post, where we show images from the damaged card. But for now, I’m stuck.
Acknowledgements
I am grateful to many folks who have helped me get this far. Steve Cole lost one of his cameras in the Archie Creek fire, and then recovered the SD card and sent it to me. Mike McKeown at Hesse Mechatronics answered my random email, and pointed me to some folks who might be able to help. Adrian Pyke of Micro-Precision Technologies, Inc. donated his company’s equipment to obtain high resolution photos of the die I sent him. Giles Read donated his considerable photographic skills and the use of his high-resolution X-ray machine. Without their help, this post would not have been possible.

I will never look at my SD card the same way again! Amazing technology. Amazing dissection analysis.
It is amazing how much tech is packed into small, cheap, everyday things. Glad you enjoyed this “deep tech” post!